When first unpacking my Nintendo Switch, I quickly realised I had a problem:
The Switch, though sleek and slender, had an uglier fatter brother: the dock. This bulky beast hugged the Switch and together they couldn’t squeeze under my TV.
The gaps in my entertainment unit were built for athletic consoles and gym-going Blu-ray players. Not Nintendo’s “Who ate all the pies?” dock.
I needed a solution.
I tried placing the dock on the floor. But, predictably, the dog mistakenly thought it was a meaty treat and dragged it back to his lair.
I tried putting the dock behind my TV. But the Joy-Cons feeble cries for a wireless connection were never heard through my 5mm thick TV.
Then, my partner came up with a bright idea: why not lay the Switch dock flat on its side.
What a great idea! She’s always coming up with great ideas! But that got me thinking:
Can the switch dock be safely laid flat on its side? Realizing I couldn’t be the only person with this question, I jumped into an investigation to seek an answer.
This is what I found…
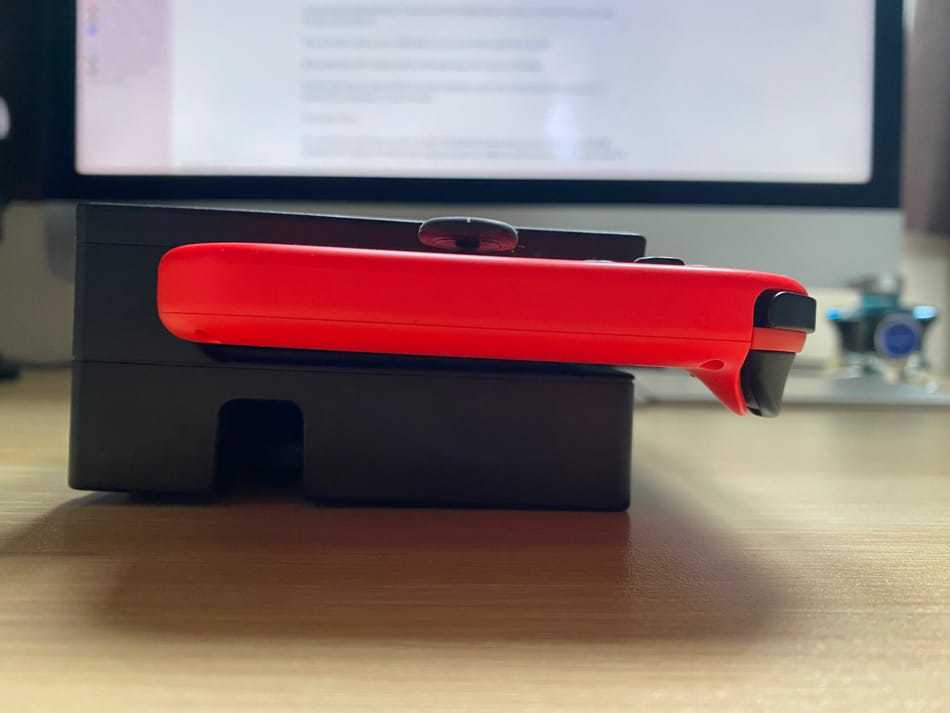
Can the Nintendo Switch dock lay flat on its side? The Nintendo Switch can lay on its side but it can’t be laid completely flat. Instead, the Switch dock must be propped up slightly so that the Switch’s vents have access to fresh air and so the Switch doesn’t slide out. This can be easily achieved with a few balls of Blu-Tack.
Okay, now you know the Nintendo Switch Dock can be laid on its side. But before I slice into the meat of the article and explain how to put the Switch dock flat, let’s take a quick look at some of the problems that stand before us.
Problems with laying the Nintendo Switch dock completely flat

Here are some of the problem we face when trying to lay the Nintendo Switch dock flat on it’s side:
- If you lay the dock flat on its side, Switch logo facing up, the Switch is actually angled down and can, with a little jiggling, slip out of the dock.
- When on its side the Switch places a little bit of pressure on the USB-C connector inside the dock. Fortunately, this pressure is very slight and is completely removed by angling the Switch dock up just a little bit.
- When placed flat on its side, the dock’s vents, which give the Switch access to cool air, are mostly obscured. The only gap available for the Switch to suck air is through the cable outlet hole. And this is usually stuffed with cables.
Okay now you know some of the issues we face, let’s take a look at how we can lay the Switch nearly flat while avoiding all of the above problems.
How to lay the Nintendo Switch dock nearly flat

In this method, I’ll show you how to lay your switch as flat as possible whilst avoiding all of the issues I discussed above.
You will, however, need one thing to make this method work: Blu-Tack. This squidgy putty-like substance offers a lot of benefits when propping up the Switch dock:
- It’s sticky – It holds the dock in place even when pushing the Switch in
- It’s firm – It won’t collapse under the Switch’s weight
- It’s easy to handle – You can have your Switch dock on its side in a couple of minutes.
- It’s not permanent – You can easily move your dock then reattach it with the Blu-Tack later.
It is worth noting that you can, if you really want to, replace the Blu-Tack with sticky rubber feet. But you’ll have to stack a few of them to get the desired angle. If your heart really is set on rubber feet, take a look at these ones.
Let’s take a look at the method:
1: First, slide your Switch out of the dock and disconnect your Nintendo Switch dock. Set aside them both for a minute.
2: Grab your Blue-tack and break off four pieces. Roll them into balls about 2cm across. Set them aside once you’ve done this.

3: Grab the dock and place it on a flat surface Switch logo facing down.
4: With the dock’s back facing up towards you place one ball on each corner of the flap on the back of the Switch. Place the balls roughly 0.5 cm in from the edge of the case. Take a look at the photograph below for reference.
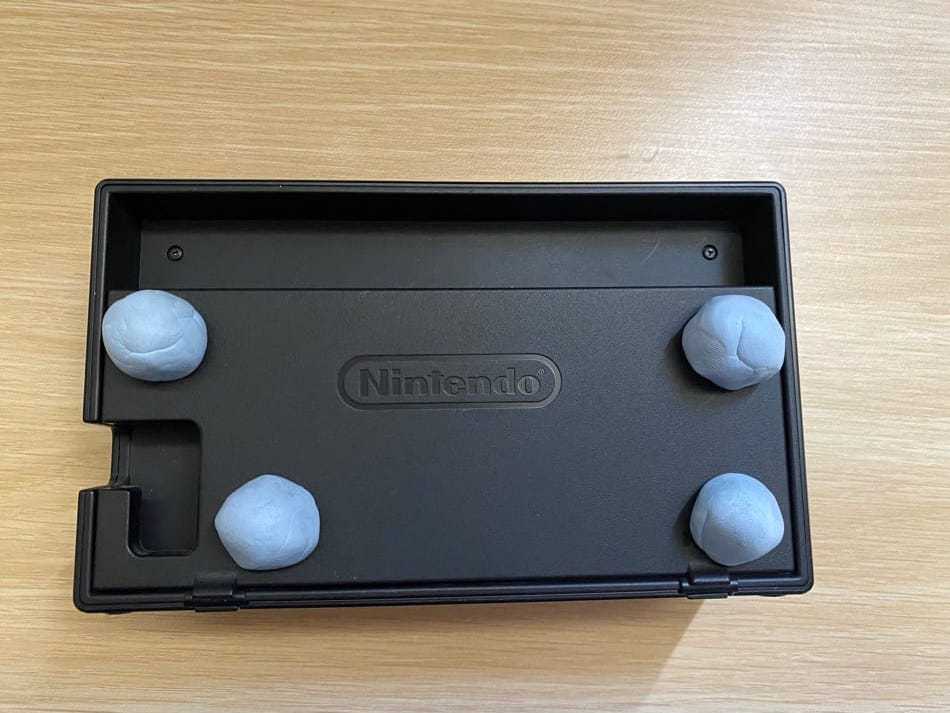
5: Press the balls of Blu-Tack into place without losing their shape.
6: Now, take your Nintendo switch case to where you want to plug it in. Don’t put it Blu-Tack side down yet.
7: Connect the cables to your TV and power supply. Reconnect all cables to the Switch dock while making sure the Blu-Tack balls don’t fall off. If they do, just pop them back onto the dock.
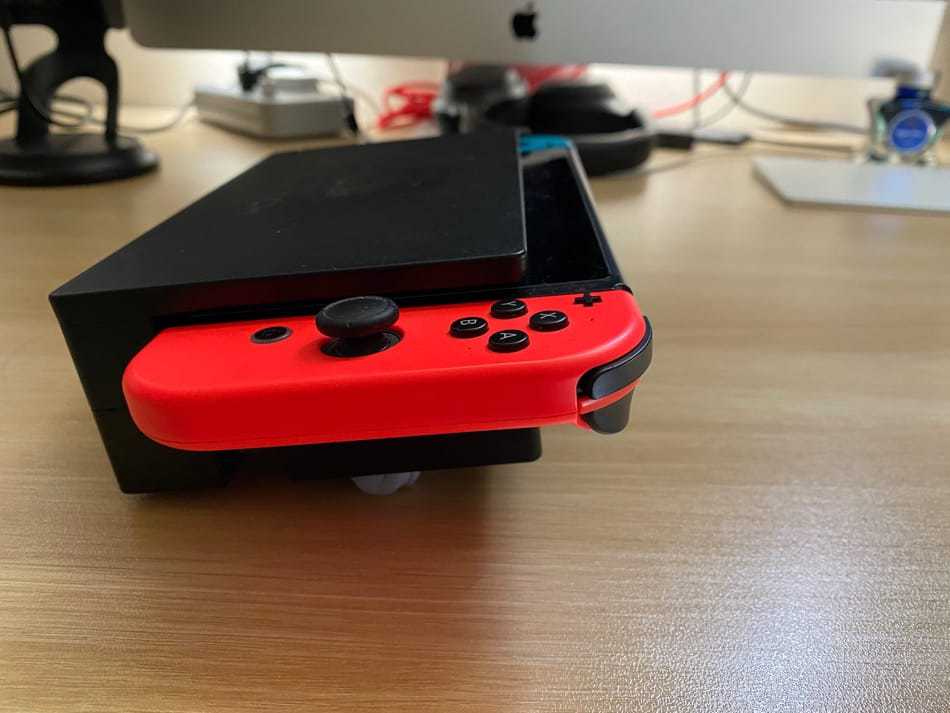
8: Next, turn the dock so that the Blu-Tack is facing down. Place it gently onto the surface where you want it to stay.

9: Press down on the back of the Switch dock (Underneath the Switch logo) until the back/bottom of the Dock nearly touches the surface it’s on. Do not press down the top/front of the dock. The dock should now be angled slightly up with the unsqueezed Blu-Tack balls supporting the front. Also, this will stop the Switch dock from sliding.

10: Try inserting the Nintendo switch. It should slot in easily without any problems and it and the dock should stay in place.

Conclusion
This wouldn’t be one of my articles without a lovely put-together and succinct (who am I kidding?) summary of all the main points. Let’s take a look:
- The Nintendo Switch can be laid on its side but it can’t be laid completely flat
- This is because:
- The Switch Dock is slightly angled so that on its side the Switch can easily slide out
- When the dock is on its side, the Switch puts a lot of pressure on the USB-C connector
- The Switch’s vents don’t have access to fresh air when the dock is laid flat on its back
- The dock can be placed nearly flat at a slight angle so that the Switch slides into it
- This can be achieved by Simply rolling up four balls of Blu-Tack and placing them underneath the switch dock and pressing down on the bottom/back of the dock to create an angle to insert the Switch
- You can use stick-on rubber feet instead of Blu-Tack if you wish
What Next
How can I add credit to my Nintendo account? Basically, you need to go to the eStore and then go to your account. From here you can add credit by adding your account details. Check out this article that’ll explain all of this in more detail for you.
How long will the Nintendo Switch be around? At least until 2026. But newer Switch will inevitably come out, so you’ll be able to invest in new consoles. Want to know more about this topic, read more about it here.
How do I know what Switch I’ve bought? There are a few things you can check to see what Switch you’ve bought. These include the box, the model number, serial numbers, product description, and price. Still not sure what to look out for? Check out this article here.