
I was cleaning out my Nintendo Switch headphone jack the other day by sticking an old toothbrush into it. Yeah, I know this doesn’t sound amazing!
To cut a long story short, my plan didn’t really work out. And although I didn’t actually break my Switch, I’m fairly confident that I’ve scratched the insides of the headphone jack.
So, this got me thinking about how to clean the 3.5mm Nintendo Switch headphone jack properly. Here’s what I found out…
How to clean the Nintendo Switch headphone Jack? To clean the Nintendo Switch headphone jack properly you’ll need to use a selection of these items: some compressed air, some Q-tips/toothpicks, potentially some rubbing alcohol but not essential, some sellotape, a paperclip, and an interdental brush.
You won’t need to buy every item I’ve mentioned, but you may need to use multiple cleaning methods listed below if you’ve got a filthy headphone jack!
Let’s get cleaning!
What you need to get

Here are the items that you’ll need to get, but have a quick read through my methods before you buy everything on this list. For example, cleaning method one might do the job for you, and you won’t need to try another cleaning method.
Try my cleaning methods below one at a time. You might strike gold at method one!
How to clean a Nintendo Switch headphone jack correctly
There are a couple of methods you can try to clean out your dust-stuffed headphone jack. I’ll start with the easiest solutions first and work down to more advanced cleaning methods.
Or if you’re struggling to clean the jack out, you can just work through the methods one by one. This way, no matter how slightly dusty or darn right grotty the slot is, you’ll have given it a pro-clean!
Ohh and just before I dive into the cleaning methods with you… remember to always switch your Nintendo Switch off before you start cleaning any part of it. You don’t want your lovable handheld console switching on and losing your precious gameplay midway through a clean…
And off we go…
Method 1: Compressed air

This first method can be used on its own or with any of the methods listed below.
1: Buy a can of compressed air, or use one you’ve already got in the house.
2: Turn the can so it’s on a 45-degree angle and squirt the canned air into the Switch’s headphone jack.
3: Do this a couple of times. It’s really good at cleaning out gritty bits of dust and hair.
If you’ve only got a tiny bit of dirt in your headphone jack you might’ve just cleaned it out by using this method, but if not move on to Method 2 below.
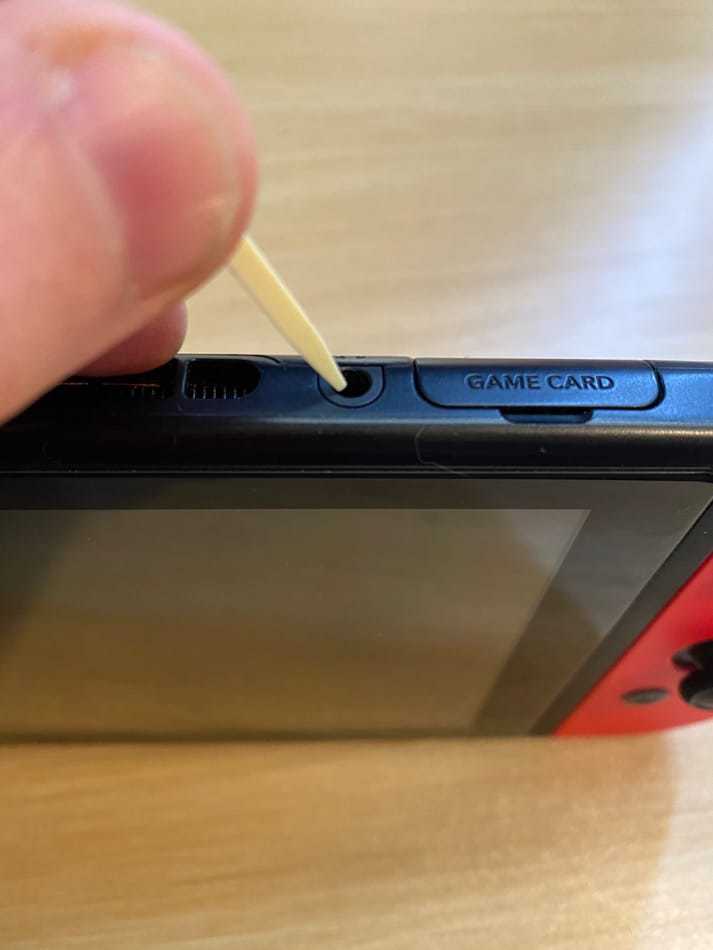
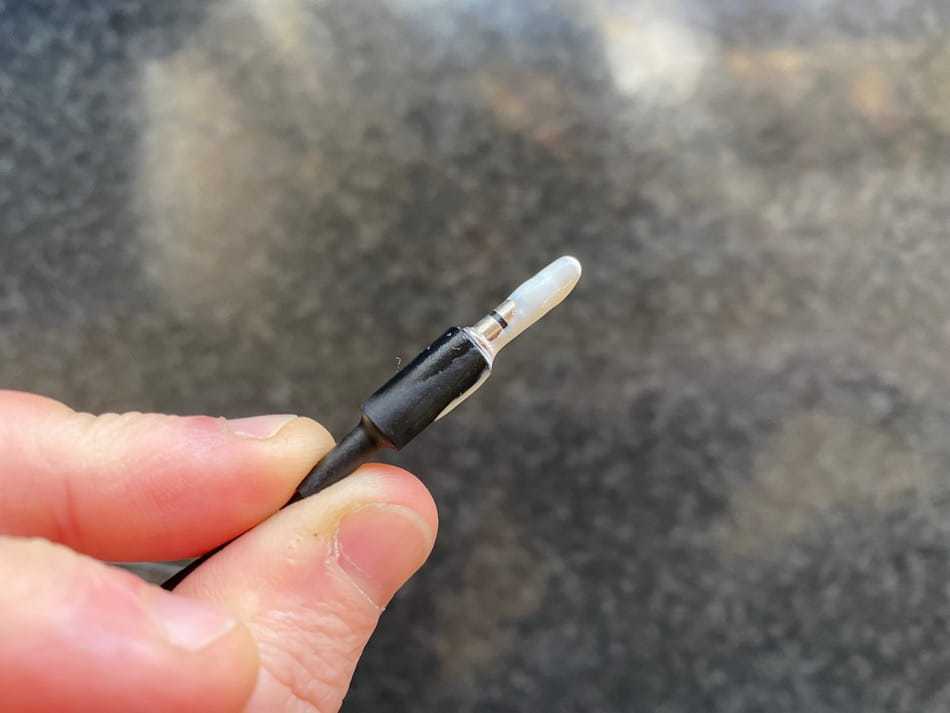
Method 2: Q-tips or toothpicks

So, if you need to do a deeper clean you’re going to need a tool to get inside the Switch’s headphone jack to prise out the dirt.
Two of the best tools for this job are a Q-tip or a toothpick.
If you’re going to use a Q-tip you’re going to need to pull some of the cotton wool off the end to allow it to fit into the machine. The toothpick, on the other hand, should slide right in.
What you need to do is:
1: Slip the Q-tip or toothpick very (!) gently into the headphone jack.
2: Try and move the Q-tip or toothpick around, I know you won’t be able to move them around much but try your best to loosen any tough grime.
3: You’ll see dust and dirt moving around, so tip your Switch upwards (so the headphone jack is facing the floor) to allow anything to drop out if need be.
4: You may need to squirt some compressed air into the headphone jack again to clean the last few pieces of grime out.
If you’re not convinced on this method try Method 3 below.
Method 3: Sellotaped paperclip

This method involves you straightening out a paperclip and wrapping some sellotape (sticky side up) on one end of it.
What you need to do is:
1: Take your paperclip and insert the sticky sellotaped end into the Switch’s headphone jack.
2: If you stick the non-sticky end in you’re essentially using a toothpick-like tool. So, it’s really important to stick the sticky side in.
3: When the paperclip is in the headphone jack you can move it very gently around so that the sticky tape picks up the dirt that is inside.
If I’ve still not convinced you with my methods you can dry my posher method below…
Method 4: Interdental brush

If DIY isn’t your thing and you don’t want to buy any new goodies, you could rummage around in your bathroom cabinet at home, to try and find an interdental brush.
An interdental brush looks like a tiny toilet brush in appearance, but it’s actually used to clean the gaps between your teeth. It just so happens that this wondrous little thing can be used to clean your Switch’s headphone jack too.
Here’s what you’ve got to do:
1: If you want you can use some compressed air to blow out any dirt you can see (but not essential!). Then grab your interdental brush and pop it into the 3.55mm hole.
2: Move the brush around inside carefully, and remove as much dirt from the headphone socket as you can.
3: You shouldn’t really poke the whole too vigorously, but you can apply light pressure to get harder dirt off.
For those of you who don’t clean your Nintendo Switch headphone jacks at all, you’re at risk of having a real stinker of headphone socket on your hands. Months, or maybe years, worth of dirt might not come off using the method above, so you better turn to the big guys.
Method 5: Q-tips and rubbing alcohol

You should only really use this method as a last resort, because it could damage the Switch’s headphone jack if not done correctly. For example, if you got some peanut butter trapped in the headphone jack, you’d probably have to do this.
You need to grab a Q-tip and some rubbing alcohol for this method. Oh, and the alcohol in question here is a special kind, so your off-the-shelf beer isn’t going to work.
Here’s what you need to do:
- Pour a tiny amount of rubbing alcohol into a pot – no need to go overboard.
- Get your Q-tip and take some of the cotton wool off the top.
- Optional – squirt some compressed air into the headphone jack to blow out any unwanted dirt.
- Dip the Q-tip in the rubbing alcohol – DO NOT SATURATE the whole thing in alcohol.
- Pop the Q-tip inside the headphone jack.
- Move the Q-tip around so the alcohol covers the area.
- You really don’t need to put too much alcohol into the headphone jack because it’s extremely strong and will break down the dirt inside in no time.
- Use the same Q-tip to clean out any initial dirt.
- Get a new dry Q-tip to poke inside the headphone jack to pull out the last of the tough dirt and to pick up any moisture.
- Leave the headphone jack to dry naturally for a few minutes.
- Don’t stuff any headphones into the socket at this point.
And there you go, 5 easy and quick ways of cleaning a headphone jack! Again, I’d like to say that you can either try these methods one at a time, or you can work through them one by one. You do what’s best for you, your budget, and your Nintendo Switch’s headphone jack.
As with any cleaning, there are a couple of don’ts and potential issues that could pop up, so I’ve got a list of them below. You probably should check them out before you start cleaning… I know you’re raring to go but stick with me for two more minutes.
Don’ts and potential issues you may encounter

So, just quickly before you set off to clean I want to cover some basic don’ts and potential issues. Here they are:
- Don’t go ramming your tools into your headphone jack. Yes, I know the headphone jack has been designed to have something inserted into it, but that doesn’t mean you should go poking anything willy-nilly into it. You’ll probably have to tailor your tools to fit inside.
- As I mentioned above, rubbing alcohol should be used as a last resort. If you do choose to use it, be aware that it may cause corrosion.
- If you choose to use the toothpick, paperclip, or interdental brush methods, you might find that you have some scratch marks in the headphone jack. Being careful and gentle should minimize this risk for you.
- If you use Q-tips you might find that small traces of cotton wool are left behind in the headphone jack. If this happens you would need to remove the leftover pieces either by using tweezers, get a toothpick to pull it out, or use some compressed air to blow it out.
- Don’t even think about using water to clean the headphone jack. If you do, you’re heading for disaster.
Being cautious and careful will do the trick here.
Why do you need to clean your Nintendo Switch headphone jack?
It’s really important to clean your Switch’s headphone jack for a number of reasons, but the most important reason is because it’ll improve gameplay for you when you have headphones plugged in.
There are so many headphone options you can choose from right now. But they do need a clean headphone jack to work well.
The next big reason is, this is where large amounts of dust collect. So, in terms of keeping the overall performance and condition of your Switch in perfect working order, a basic clean is good.
Preventing future problems
If you’re not one for cleaning your Switch’s headphone jack then you could stick some black tape over the hole to cover it. This will work okay if you’re not planning on sticking headphones in there anytime soon.
On the other hand, if you do like using headphones and you’re not into cleaning, keeping a basic can of compressed air at your side would be good. After and before every use, you could squirt some air into the headphone jack to flush out any dirt.
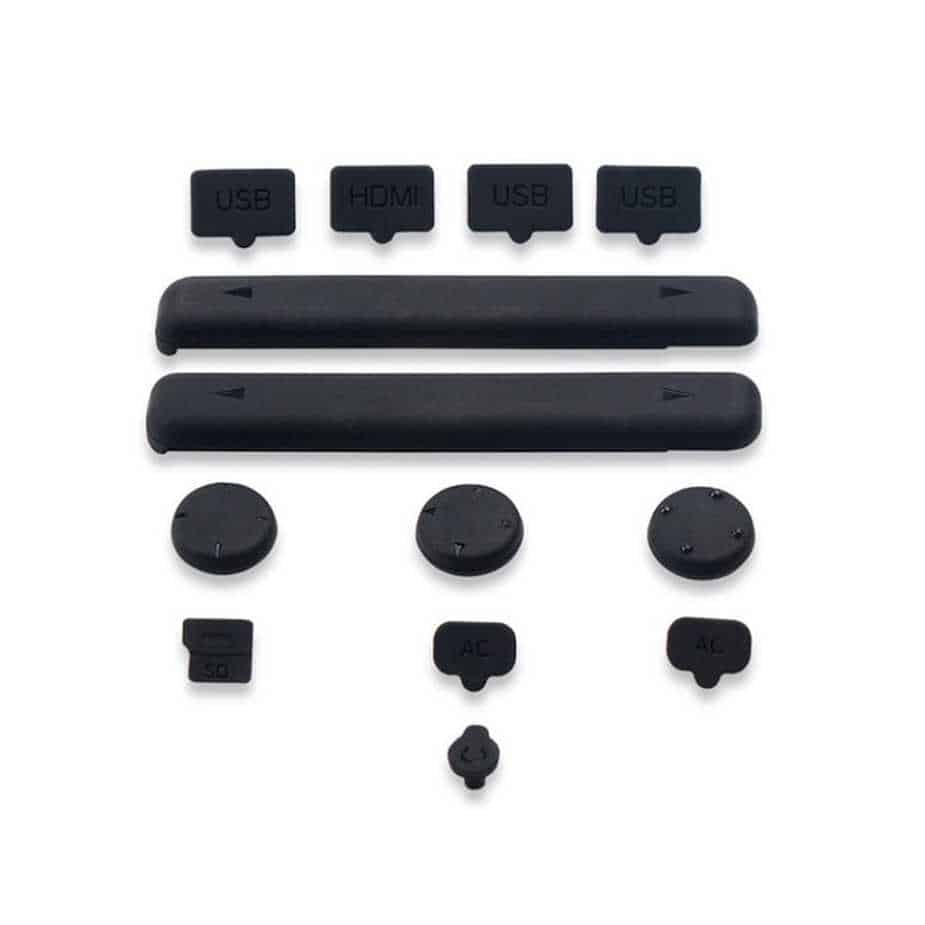
You can also get a dust plug that you can stick into the Switch’s jack to stop dust getting into it. These wee silicon gems are typically waterproof and are great at keeping the gunk out of holes.
They are super easy to pop in as well and they stay in place until you want to take them out. Plus, they usually sell this goodie in a bundle with other Switch protective equipment, like screensavers and extra Joy-Con caps.
Take a look at this collection of Switch port dust covers here.
Also, check that the headphone cable you’re about to use is clean before you stick it into the headphone socket.
It sounds simple, it’s a great way of making sure the Switch’s headphone jack stays clean. Don’t stick a dirty headphone plug into your Switch. Clean the end then stick them in.
Try not to eat and drink around the Switch, this minimises the chance of food getting stuck in the jack.
Try doing a little clean every week, this will help you to build a good cleaning habit… and that’s always a good thing. And you can transfer your new habit onto cleaning other consoles too.
Conclusion
Keeping your Nintendo Switch’s headphone jack clean is essential because if it’s full of gunk your games will be permanently stuck on mute.
A basic clean every week is really helpful and will keep your headphone jack in working condition, and none of the cleaning methods above will cost you that much either.
Here’s a quick recap of what I covered with you:
- I told you what you would need to get:
- Compressed air
- Tips/toothpicks
- Q-tips and rubbing alcohol
- Sellotape
- Paperclip
- Interdental brush
- I gave you 5 cleaning methods to try:
- Compressed air
- Q-tips or toothpicks
- Sellotaped paperclip
- Interdental brush
- Q-tip and rubbing alcohol
- I discussed some potential issues you could face and I told you what you shouldn’t do.
- I mentioned why you should keep your Switch’s headphone jack clean as well.
- In the end, I talked about how you could prevent your Switch’s headphone jack from getting dirty in the future.
FAQs
How can I add credit to my Nintendo account? Basically, you need to go to the eStore and then go to your account. From here you can add credit by adding your account details. Check out this article that’ll explain all of this in more detail for you.
How long will the Nintendo Switch be around? At least until 2026. But newer Switch will inevitably come out, so you’ll be able to invest in new consoles. Want to know more about this topic, read more about it here.
How do I know what Switch I’ve bought? There are a few things you can check to see what Switch you’ve bought. These include the box, the model number, serial numbers, product description, and price. Still not sure what to look out for? Check out this article here.