Have you got sticky, clicky, non-responsive buttons on your Switch? If so, you probably need to give your buttons a good clean to bring them back to working order!
It’s really easy to clean the buttons on a Switch, you just need to know how to do it properly. It just so happens that I’ve prepared a simple step-by-step guide below for you to follow!
But, first and foremost, how do you clean sticky Nintendo Switch buttons? You can clean sticky Nintendo Switch buttons by using isopropyl alcohol to clean them. There are a couple of extra steps to follow that involve using some toothpicks and a toothbrush, but alcohol is the key ingredient you need to use.
Let’s get to it…
How do you get sticky Nintendo Switch buttons?

There are so many possible answers I could give you right now, but I’m going to stick with the most obvious ones!
- You or someone else has tipped something over the Joy-Con buttons.
- You or someone else has eaten something sticky and not washed their hands before touching the controller.
- The controller has been dropped in something and this has resulted in sticky buttons.
- Or my personal favorite, the dog licked it and the slobber has dried on and under the buttons.
- Years of dirt is also the oldest and most popular reason for this sticky situation.
Anyway, let’s get on to the big event… the cleaning of your grubby buttons!
Method for cleaning
One of the easiest ways of cleaning your Nintendo Switch buttons is by using alcohol. Nope, this does not mean that you need to douse your controller in Prosecco to spruce it up again!
The alcohol in question is called isopropyl alcohol, or rubbing alcohol, and it’s used a heck of a lot in cleaning. This product is okay to use on your Nintendo Switch buttons because it dries really fast and it shouldn’t make the color fade on the controller.
In addition to this, isopropyl alcohol won’t damage your electronics, if you use it as instructed below. On that note, you should never pour the alcohol directly onto any controller, it’s better to dab little amounts onto a cloth and pop it onto a controller in this way!
What you need:
Here’s what you need to do:
1: Turn the Nintendo Switch off – this way the Switch won’t turn itself on midway through cleaning and lose your precious gameplay!
2: Now go and grab a toothpick.
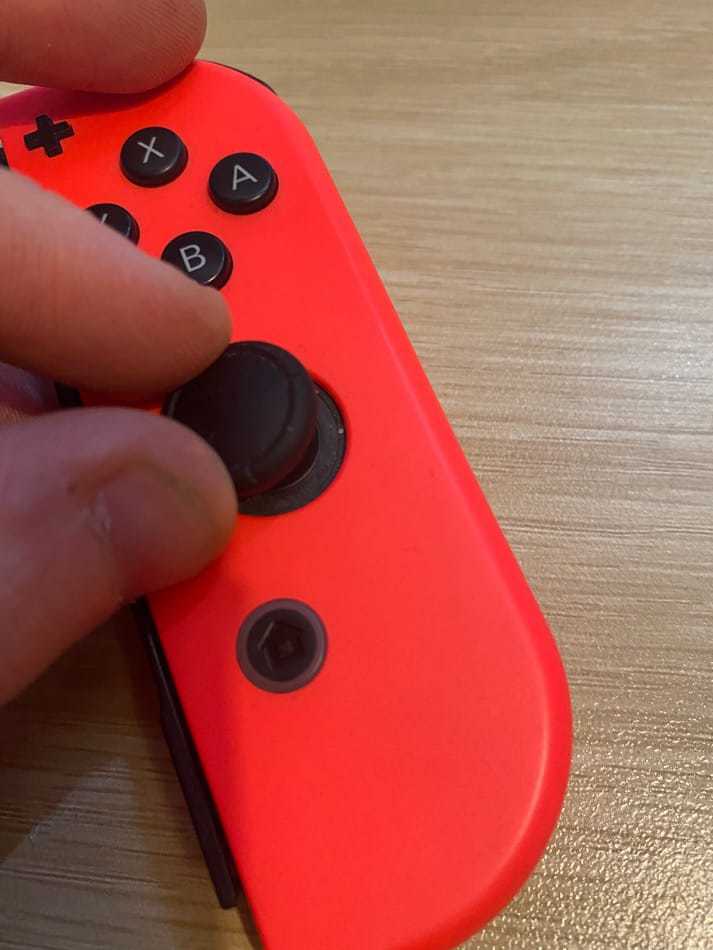
3: Gently clean around the edges of the buttons using a toothpick/pin – use a scraping method to do this as this will help to lift out any dust and general dirt from around the buttons.

4: Clean under the thumbsticks too – this small but delicate area can hold a lot of grubby muck that makes the controller very unresponsive.
5: Always work gently when using a toothpick/pin so you don’t mark the Switch’s buttons in any sort of way. Plus, you don’t want to accidentally snap the toothpick and have a small part of it stuck under a button!
6: Now go and grab a soft toothbrush – it needs to be very soft because hard bristles could mark the Switch. Don’t wet the toothbrush – In fact, just use a brand new toothbrush if you’ve got one available!
7: Use the toothbrush to scrub any excess dirt from around the buttons – try using a circular motion.
8: Give your buttons a quick wipe down with a microfiber cloth – just to get rid of any dirt that the toothbrush pulled out but didn’t pick up.
9: Now you need to grab a cup and pour a small amount of isopropyl alcohol into it – pick a cup that you’ll never use again! Do not use water! Use 99% isopropyl alcohol or higher.
10: Grab a Q-tip and dip it into the cup. You only need a small amount of isopropyl alcohol on the Q-tip – no need to saturate the whole thing!
11: Carefully maneuver the Q-tip around the buttons to clean them – go slowly! Be sure to go over edges and gaps between buttons and the controller case.
12: Go around each button one at a time as this will help to remove any sticky mess from them. You’ll find that the Q-tip doesn’t fit into small gaps and that’s okay – just wipe around the button, don’t go forcing the Q-tip in!
13: Wipe all the buttons down in this way, and if you see that a particular button is stickier than the rest work with this button a little longer. Keep testing the problem button(s). If they are still stuck, reapply the alcohol to the edges of the button so the alcohol seeps down the sides and breaks up any residue. Keep doing this until the button is freely working.
14: You’ll need to use some cotton wool to clean the thumbsticks – just dip the cotton wool into the cup filled with isopropyl alcohol and clean the sticks. Again, there is no need to saturate the cotton wool.
15: The last thing you need to do is to dip a cloth in some isopropyl alcohol and wipe it all over the Joy-Con to make sure it’s all been disinfected! – You don’t want any bacteria crawling around on it.
If you wipe your buttons and Switch down regularly the cleaning method above won’t take you too long to do every month. Obviously if you’re not a fan of cleaning and you don’t clean your Nintendo Switch buttons then the methods above may take you some time.
But, however long it takes you to do the outcome will be great! No more sticky clicky buttons, just hours of fun to enjoy!
Drying
Once you’re done cleaning your sticky Nintendo Switch buttons you need to wipe the controller down with a dry cloth. This will make sure that any excess isopropyl alcohol is scooped up. Try not to use tissues because they can sometimes leave tiny fibers behind.
Keeping your Nintendo Switch buttons clean

You don’t want to spend hours every week cleaning your buttons, so follow my basic tips below to keep them clean.
- Perform a deep clean of the Switch every month – clean the whole Switch at this point.
- Wash your hands before you use the controllers – this limits the amount of dirt that can get onto the buttons.
- If you eat something, clean your hands before you go back to playing your game – this is where a lot of mess is going to come from.
- Don’t put the Nintendo Switch controller next to a liquid that could spill over it.
- Disinfect your Nintendo Switch controllers after every use – this is basic hygiene and keeps bad bacteria away.
- Keep a cloth and some isopropyl alcohol near the Nintendo Switch, so you remember to clean it.
Why do you need to keep the buttons clean?
It’s really important to keep any controller clean because controllers can carry huge amounts of bacteria! Literally, every time you pick up a controller you’re transporting millions of germs onto it – it’s pretty disgusting when you think about it…
You also need to keep the buttons on your Switch clean because it’s quite a social console. What do I mean by this? Well the Nintendo Switch is used a lot in family parties, kids use it, and adults play games on it too. That’s a lot of hands-on one console, so you kinda need to keep the buttons clean for the sake of everyone else!
Not to mention the gameplay side of it! Sticky buttons interfere with your gaming experience. They can stop buttons from working correctly, and sometimes if you’ve got grubby buttons you get absolutely no response from the controller.
This makes playing a game difficult, and it’s not going to make you want to play any kind of game on the console – so keep the buttons clean for an all-around good experience for everyone!
Conclusion
So, now you know how to clean your sticky Nintendo Switch buttons. Here’s a quick recap of what I covered in this article.
- Your Switch Buttons can get sticky because:
- Fluids fall on it
- Stick hands playing with it
- Food and dust build-up
- Pet slobber
- The main method for clean the Switch buttons is using Toothpicks for mechanical removal of debris around the buttons and isopropyl alcohol chemical removal of debris.
- You should dry your controller before using it.
- It’s far better to clean your Switch after each use quickly than to deal with Sticky buttons.
- Prevention is the best form of medicine for your Switch’s cleanliness.
Let me know if you have your own solution in the comments below!
What Next?
I’ve got a lot of Joy-Con drift, what’s that all about? Joy-Con drift is when your Joy-Con controller thinks you’ve inputted a command but you actually haven’t, so things start moving in-game on their own. This problem is extremely annoying, so here’s what you need to do… either recalibrate the thumbsticks, replace the thumbsticks, update your Joy-Con, try spraying some condensed air over the Joy-Con (in case the issue is dust-related), or contact Nintendo Customer Services to get it repaired. For further tips check out this article by IGN.
How do I connect my Nintendo Switch to a TV without using the Dock? The answer to this may be simpler than you think. All you need to get is a special adapter that mimics that of the Switch dock. We’ve got a whole article dedicated to this that you can read right here.
My Nintendo Switch charging port seems really dirty, how do I go about cleaning this correctly? Easy! All you need to clean the charging port on a Nintendo Switch is… A jewelers loupe, toothpicks, and some compressed air that comes in a can. You can get the full step-by-step guide on how to clean the charging port right here.