As a content creator, I needed to take my game to the next level to compete. I decided that the easiest way to make the biggest impact was to add some acoustic panels to my workspace.
But there was a problem:
Acoustic panels were expensive!
So I decided to look into making my own acoustic panels to best utilize my small space and keep costs low.
I learned some fantastic tips and tricks the hard way. Let me tell you some simple secrets on how to make your own acoustic panels so you don’t make the same mistakes I did.
How to make your own acoustic panels? The goal of acoustic panels is to absorb and/ or deflect sound waves. To make your own acoustic panels, use absorbent materials such as foam, this will allow sound to pass through and become trapped in its many layers. This can be combined with the shape of your acoustic panels to help dilute sound waves. Sound dilution is achieved by deflecting sound into smaller spaces forcing the sound to dissipate. The shape most commonly used is a pyramid.
What material is best for sound absorption? How can you hang your acoustic panels on the wall? Is there a low-cost way of making acoustic panels? These are the questions I started with. I didn’t need to have radio-like quality but I did want to make my videos sound like Sean Connery in Highlander.
His opening monolog was recorded in his bathroom! Have a listen…
You might be able to save time and money by using the right materials you have just lying around your house. Putting together your own acoustic panel doesn’t have to be hard and you can give your workspace a great look. Proving that acoustic panels don’t have to look horrible and cost loads to be effective.
How to make your own acoustic panels using recycled packaging.
I grew up watching arts and crafts shows on TV. Where I would be taught how to make anything from cereal boxes, old newspapers, and glue. But sadly as I aged, and the rigors of life swallowed my time, I started to buy more and make less. Getting into content creation has helped me to kindle that child-like excitement of making things.
So when I needed some acoustic panels to go into my streaming workspace my first thought was how can I make them. Let me tell you making your own acoustic panels has never been easier. I have discovered you can spend as little or as much as you want when making acoustic panels.
There is a range of low-cost options for how to make your own acoustic panels.
Sometimes the low cost, homemade panels are better than over-engineered panels.
I know, you’re probably thinking that using recycling packaging is silly. How can packaging that you were going to just throw away be as good as an expensive commercial product?
Well, let me tell you about the wonders of cardboard and egg cartons.
How to make your own acoustic panels using egg cartons.
(I’m talking about the cardboard egg cartons in this section. If you buy your eggs in plastic then this will not be as effective.)
So why egg cartons? It is all about their glorious shape. The cones or pyramids that rise up and delicately hold eggs. This is the perfect shape to diffuse sound.
You want to collect only the part of the egg boxes that has the cones. You need to collect as many as the area you wish to cover. The bigger area you cover the more effective the results will be.
You can often get egg cartons for free in your local grocery store. Just pop in at the end of the day and ask them if they have any left over. Alos, tell them why you need them. In my experience most stores will be happy to let you take the leftover cartons. Afterall, normally they have to pay to dispose of waste!
Depending upon the type of boxes you collect you might need to tidy the edges up. This can be done by just using a pair of scissors to make the edges as flat and straight as possible.
Once you’ve collected enough cartons, it’s time to stick them together. It is best to stick the egg cartons to a piece of cardboard. This will help when it comes to sticking the panels onto the wall.
There are a few methods you can use to stick the cartons down. You can use sticky tape, blue tack, even some small pins depending on the thickness of the cardboard.
Then comes hanging the panels on the wall. The great thing about making your acoustic panels like this will mean they are incredibly light. This will mean that the panels will be easier to attach to walls. You could use any methods that would work for hanging a picture frame. From a good old nail and string to more modern adhesive strips.
Now you have a great panel that will reduce the reverb in your workspace. You can always add a lick of paint to the acoustic panel to add a bit of style.
How to make your own acoustic panels using recycled foam.
I order way too many things from online shops like Amazon.
And that leaves with two problems:
- An empty wallet
- A lot of leftover packaging
I have piles of Amazon logo covered boxes. Enough foam peanuts to open a child’s soft play area. And more sheets of foam than a bed-making factory.
There are a few ways to recycle this packaging into acoustic panels.
Turning sheet foam packaging into an acoustic panel.
If you are lucky enough to get a sheet of foam as part of your package you have a few options. You could just stick it to the wall as it comes. As the air bubbles in the foam will help trap the sound inside until it dissipates to low sound levels. This is effective sound absorption and the thicker the sheet, the better it will be.
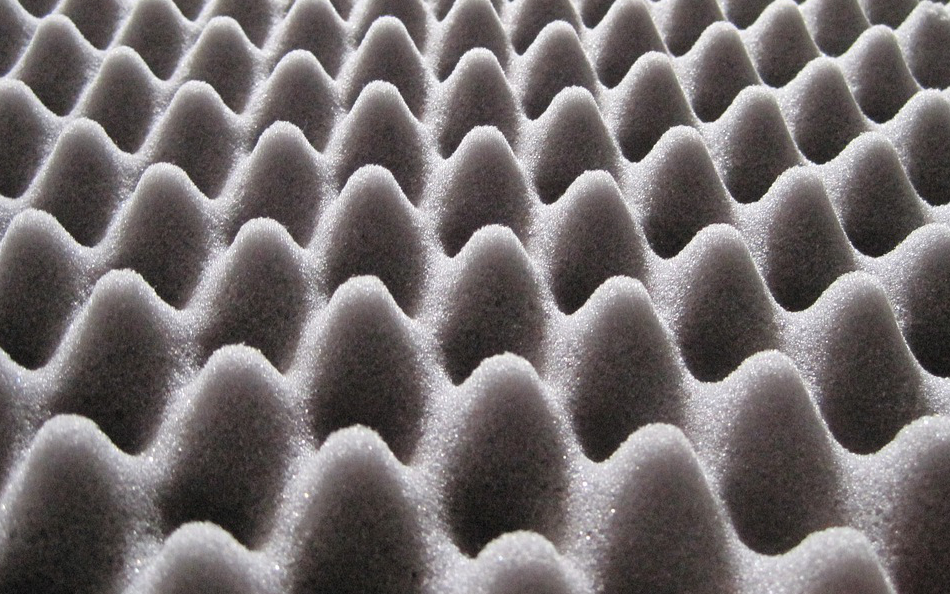
But I’ll be honest with you, most of the foam used in packaging isn’t the best shape to make acoustic panels because it’s flat.
But if you have a foam sheet like in the image above, then you’re in luck. You could just stick the sheet onto the wall, pointy bits sticking out, and you’d have a basic acoustic panel. Nice!
However, you should have a little caution when doing this.
The sheet may have glue on it or could even be stained which could, in turn, stain your wall.
You could hide these imperfections by covering the foam sheet with fabric. To do this you will need to use a thin fabric. The sound needs to easily move through it to get trapped in the foam. If the fabric is too thick then the sound will bounce off the same as it would on a wall. This would defeat the point of your acoustic panel.
Turning foam packing peanuts into an acoustic panel.
Packing peanuts are pieces of foam that look a lot like white or cream Cheetos. Please don’t try to eat them though! They don’t taste very nice at all! (I found out the hard way!)
Unfortunately, these foam peanuts can’t be recycled by traditional means. They end up in landfill. Shame on you manufacturers!
Fortunately, these peanuts can be upcycled into pretty good acoustic panels.
Packing peanuts can be glued on to a sheet of cardboard then hung on a wall. To do this you need to glue the peanuts one-by-one side by side on a cardboard sheet. Which, in all honesty, is fidelity and time-consuming.
But these sort of home-brew acoustic panels are actually really effective.
Another way to join all the peanuts together is with a good-old-fashioned needle and thread. You can make rows as if you were making a necklace. Then sew them together, just be sure to pack them in tight. Watch those thumbs, though!
Packing peanuts also make a great filler for sound absorption. You can make a deep box frame out of some wood. Just add a fabric cover to hold them in and attached to the wall.
If you are not one for woodwork you can always modify a deep frame picture frame. Just remove the glass or plastic and staple down some light fabric. This will allow you to add as many packing peanuts as you can.
The thickness of the foam will allow sounds to be absorbed and trapped inside. The thicker the better. Reducing the overall sound that is bounced back into the room.
How to make your own acoustic panels using Towels.
Towels! Yes, towels. The ones you use to dry yourself after a shower or bath. They have fantastic acoustic dampening properties. Seriously. In my experience towels are more effective at dampening sound than high-end foam acoustic panels.
The millions of exposed threads on a towel gives it a rough surface and partially hollow insides which will help disperse and absorb sound.
The rough surface will scatter sound waves much better than a flat wall. Towels trap sound between it’s exposed surface threads.
The price differences between towels and high-end acoustic setups are worlds apart. It will not give you the same experience as a $100,000 setup but, shockingly, towel sound panels will be better than 1000-2000 dollars worth of foam acoustic panels.
For most content creators the simple addition of a towel hanging on the wall may be all that is needed to decrease reverberation.
Plus, if you are just doing voice work, like a podcast or a voice-over, you don’t even have to worry about people seeing your latest “Hawaii” towel dangling off your wall.

How can I hang towels on my walls?
You want the simplest way? OK…
Hold the corner of the towel up against the wall so the length is hanging down. Then hammer a nail through one corner into the wall. Then do the same again to the other corner. Let the towel hang down, and well done, you have yourself a makeshift acoustic panel.
Hanging towels on the wall like this is simple and effective.
But it does look a tad messy.
Another, less messy way is to hang your towels over a washing line. You need to take into account weight when attaching a line to the wall. Hanging a towel in this way will also half the size of the towel making it less effective.
A curtain rail is the easiest way to hang towels permanently on any wall. The curtain rail can be masked by placing it below a shelf. In order for the towels to hang it is best to cut small holes with scissors. Alternatively, a fabric punch will also give you crisp and clean results.
Add durability to the holes using eyelets this will make sure the holes don’t rip. Reinforcing the holes will also give the towel a professional look.
How do I convert my towels into deep boxed picture frames?
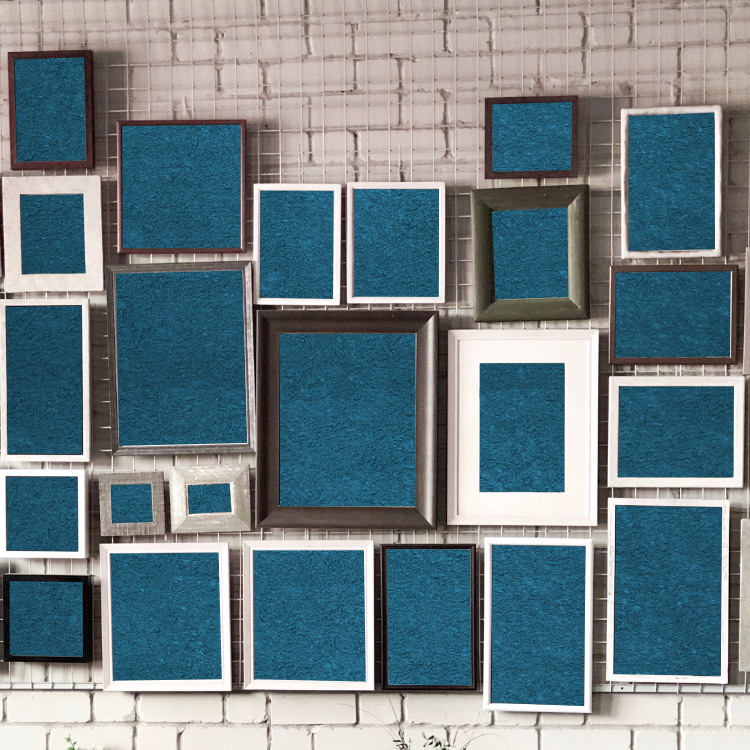
Converting a deep boxed picture frame is another great way of using a towel while having a clean and stylish look.
Open up your picture frame by removing the glass/plastic until you are left with just the frame. Then place your towel down on a table and use the frame to find the part of the towel you want as the image.
Remember to add the depth of the side of the frame and some for the back. This will allow you to fix the towel to the back of the fame.
Also, remember the old golden do-it-yourself rule: Measure twice cut once.
Once cut out, wrap the cut-out towel around the frame and staple to the back of the frame. You are stapling to the back of the frame instead of the sides to make sure it looks good no matter where I stand in the room.
Depending upon the thickness of your towel, you will find that in the corners there is too much fabric for it to look tidy. One way to get around this is to cut a square out of each corner. But make sure you have enough fabric to comfortably cover the sides of the frame.
If you don’t or can’t find the right size picture frames, then making a boxed frame is easy to do without having to have a workshop.
You can even increase the effectiveness of your towel frames by filling it with packing peanuts or some insulation such as mineral wool insulation.
How to make your acoustic towels look more stylish.
What if your workspace is on camera? You might not want your viewers to see towels hanging on the wall. I have a simple idea for you.
Game themed towels.
If you pop over to Amazon you will see a host of gaming-themed towels. You could hang them up as they come or you could convert them into picture frames. For Instance, check out this Pac-Man towel.
This will help to create a stylish gaming theme for your workspace. Most of your audience won’t even realize that they’re towels. Your audience will just think that you have some really nice prints on the wall.
Like artwork, you can constantly swapout the towles to keep your workspace fresh and exciting.
How to turn insulation boards into acoustic panels.
Using acoustic insulation boards is going to be a premium option. Materials such as fiberglass or mineral wool insulation can be expensive but will offer great sound absorption.
Insulation normally goes into the walls. But you can make a frame and cover with fabric to make them a centerpiece within your home or studio.
When handling fiberglass alway make sure you wear gloves and masks. Using fiberglass means that it will need to be housed in a box frame and covered with a thin fabric cover.
Mineral wool insulation such as ‘Rhino acoustic absorption panel’ is great at absorbing sound straight out of the box. You might still wish to build a frame and cover with thin fabric to give it a custom look that will not make your room look plain.
Cover your insulation of choice with thin fabric this will make sure that the sound easily travels through the fabric instead of bouncing off. If the fabric is too thick then the sound will bounce off like a wall. If only some sound penetrates the fabric, then only a small amount of the sound waves can be absorbed. Defeating the point of spending money on the insulation.
How thick is too thick for the fabric? If you can hold it up to your face and easily talk thought it then it shows that sound is easily passing thought.
Conclusion
You can spend as little or as much as you want on acoustic panels. You can use recycled materials and household items such as towels, all the way to the high-end acoustic insulation.
Whatever materials you decide to use to build your own acoustic panels, make sure to use all of your tools correctly. Follow the safety advice that comes with materials such as fiberglass by wearing gloves and masks where needed.
Understand what your panels are trying to achieve whether it be deflection or absorption.
Also, don’t have unrealistic expectations on the levels of sound suppression you can achieve. You won’t be building a 100% quiet room. That’s impossible for a home set up.
You will however be getting measurable results, that will allow you to improve your room’s acoustic capabilities.
What’s next?
What if I don’t have any tools to build my own acoustic panels? If you don’t want to, or can’t build your own acoustic panels there is a wide variety of panels readily available on websites such as Amazon.
Where should I place my acoustic panels for streaming? You should place them in and around your workspace. Focus on placing panels in your immediate area. Behind your monitor or front-facing wall. For more information check out our article: How to arrange acoustic panels on your wall.
How thick should my acoustic panels be? The thicker the better especially when it comes to sound absorption. The more material sound has to pass through the more the sound can be diluted. The dilution works by trapping the sounds within the material forcing it to bounce around until eventually runs out of energy. While some sound will escape the levels will be drastically reduced, which gives the effect of sound absorption.