
When you live stream, your voice and sound quality are dependent upon your live environment.
There are no second takes like Youtube videos where you can set the sound stage perfectly. There are no denoising algorithms to run like in Vegas Pro. You are stuck with the sound quality you have in that moment. For better, and for worse.
Streaming is your consciousness flowing out into the world. Unedited and raw for all to hear and see.
But there’s a problem:
Your sound quality can be easily compromised when live streaming if your streaming room is not sound proofed correctly.
Your perfectly set stream can be ruined by an errant police car screaming past your house. And, if your neighbors are anything like mine, you will have dogs barking constantly.
All external sounds can destroy the immersion in your experience for your viewers.
This is where soundproofing can hugely upgrade your audio.
How to soundproof a room for streaming? Your streaming room can be soundproofed by:
- Placing Soundproofing panels on the walls of your streaming room
- Covering windows in your streaming room with thick curtains
- Covering the ceiling of your streaming room in acoustic panels
- Covering the floor of your streaming room with foam tiles, a carpet, then finally, rugs.
To understand how to soundproof your streaming room, you must understand the overall goal you are trying to achieve.
I will then show you some cheap and effective ways to soundproof your streaming room.
The goal of soundproofing your room for streaming?
When streaming, bad video quality isn’t that much of an issue. Even though we are obsessed with 4k and even 8k resolutions, our eyes and brain are actually quite good at interpreting visual information even when the quality drops.
Sound on the other hand is a different story. If background sounds drown you out, nobody will want to watch you. If sirens are whaling in the background, sentences and syllables get lost in the jumble of sound waves, and any key information is lost with them.
Without your voice to entertain, viewers will quickly zone out, turn off, and turn to a different stream. Never to return again.
You could be the most interesting and charismatic person on the internet but if no one can understand you, then what’s the point?
Additionally, sound proofing helps you limit the amount of sound escaping from your streaming room. So other people who live with you in your house are not disturbed.

Better audio will at least give you the best chance to build a relationship with your audience. Without sounding too cynical, the more people value their relationship with you, the more chance you have of making money from them.
Soundproofing can make a big difference in the amount of sound that can enter or exit a streaming room.
You might not be aware of it when you are recording because you are focused on the game you are playing. Your brain is already struggling with a multitude of tasks; from reading chats, answering messages, thanking subscribers, all on top of the game you’re playing.
Your audience on the other hand just wants to be entertained. They will have no problem finding a streamer that has good audio.
Don’t make the mistake that a lot of starter streamers make: Only concentrating on visuals, when sound is just as, if not more, important.
How to soundproof your room for streaming
Simply put, the more soundproofing you have in your streaming room, the more external sounds you’ll block out, and the cleaner your audio will be received by your microphone.
Additionally, the more soundproofing you have, the less sound escapes from your streaming room. So parents and partners can sit and enjoy their sitcoms while you make your millions on Twitch.
In this section, I’ll walk you through how to soundproof your streaming room. I’ll be starting from relatively easy to action ideas that I’ve used myself before moving on to harder things to do.
But I’ve tried to keep each idea realistic, actionable, quick, and, above all, cheap to do.
If you follow all of my suggestions, your room will offer about 95% of the soundproofing a professionally soundproof room offers.
Though I must say, your results may vary. For example, if you live next to a sawmill, don’t expect miracles.
Also, keep in mind that the quality of the hardware and software that you use will affect the final quality of your audio. For a good, idea of what hardware and software you need to achieve a high-quality stream, check out my Live Streaming Equipment Setup for Gaming article.
Soundproofing windows in your streaming room
Many modern windows are triple or double glazed. This means that two or more sheets of glass are sandwiched together with a filling of air in between. This air between the sheets helps trap heat and stop sound from passing through the glass.
So, not only are these windows great for insulating a house against the cold, but they are also great for sound insulation.
The problem is, they are expensive.
Obviously, if your windows are not double or triple glazed, you are not likely to pop out and spend $1000 on a new window.
But there is a simple way to soundproof your window without draining all the cash in your bank:
Buy thick curtains.
Thick curtains will help to absorb any sound coming through the window or leaving the room through the window.
Thick blackout curtains will do a fantastic job.
They are a very cost-effective way to instantly boost the sound quality in your streaming room by catching any reverberating sounds.
Plus, blackout curtains help deaden any sound entering or leaving the room.
The thickness of them is key. The fibers of the curtain actually capture sound which then gets absorbed by the soft material.
You can also hang extra curtains over these curtains to increase the effect.
A golden rule of soundproofing is this:
The more layers you have, the better.
Soundproofing the walls of your streaming room with acoustic panels
Soundproofing the walls are the next major hurdle after soundproofing the windows.
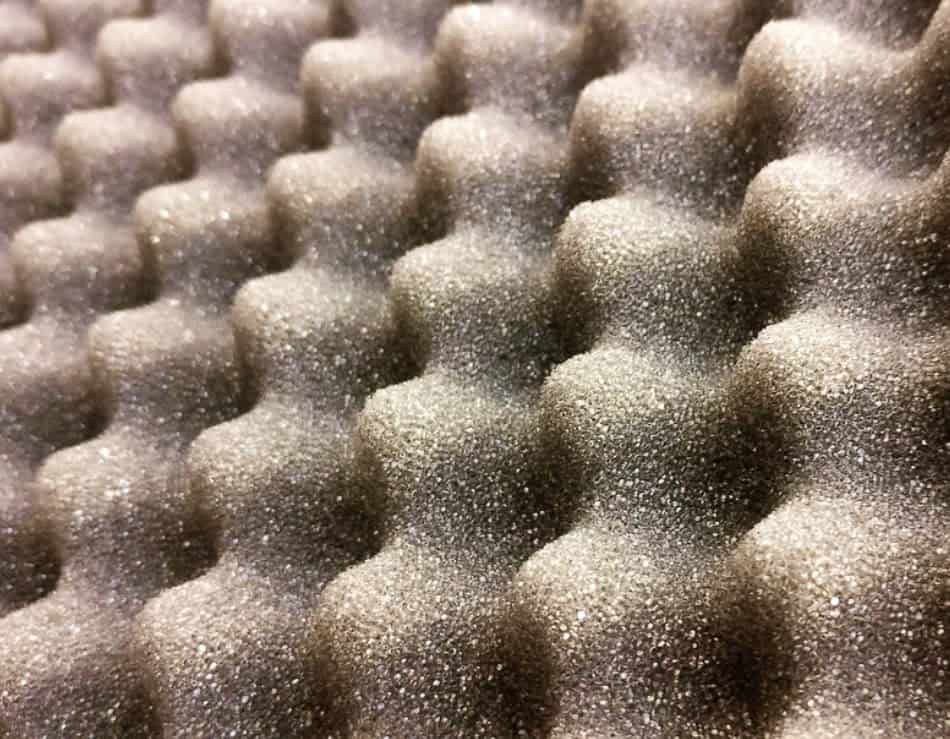
One of the best ways to dampen sound entering and exiting a room is to line the walls with acoustic panels.
Acoustic panels are the spongy panels you often see in recording studios. And they can actually be bought quite cheaply.
So, before you start, you’ll need some. Hop on over to Amazon and buy a 50 pack of acoustic panels. Don’t worry, you will quickly use all the tiles. Each panel is only a square foot which means you roughly need 9 to cover just one square meter.
Once you have the panels, determine which direction most of the sound enters or exits the room. Take your time over a few days to take note of where these sounds come from.
Most load sounds entering the room will likely come from outside. So you’ll want to cover outside walls.
If you are trying to stop sound from leaving the room, then you’ll likely want to stop the sound from exiting through an inside wall.
Either way, pick the wall you want to concentrate on and start attaching the panels to the wall. Start attaching the panels to the wall at the same height as your head when you are sitting. Then work up and down from there.
The more the wall is covered, the less sound will be able to leave or enter the room.
You’ll probably find that you run out of panels quite quickly. That’s ok.
Before you jump in and buy more, try streaming again, and make recordings of the sound.
Test the quality.
Did the panels help? If the panels did improve the quality of the recorded sound, are there still large expanses of wall still uncovered. This would indicate that more acoustic panels would help increase the recording quality even more.
Just be sure to buy one pack at a time, fit them to the wall, then test the difference. The law of diminishing returns applies to soundproof panels. The more you use, the less return on sound quality you get.
So buy little and often, and test the sound quality in between applying panels.
Soundproofing the ceiling in your streaming room
For most people, this would be a luxury unless you were setting up for professional or commercial recording. But what if you have noisy neighbors or are working from a basement?
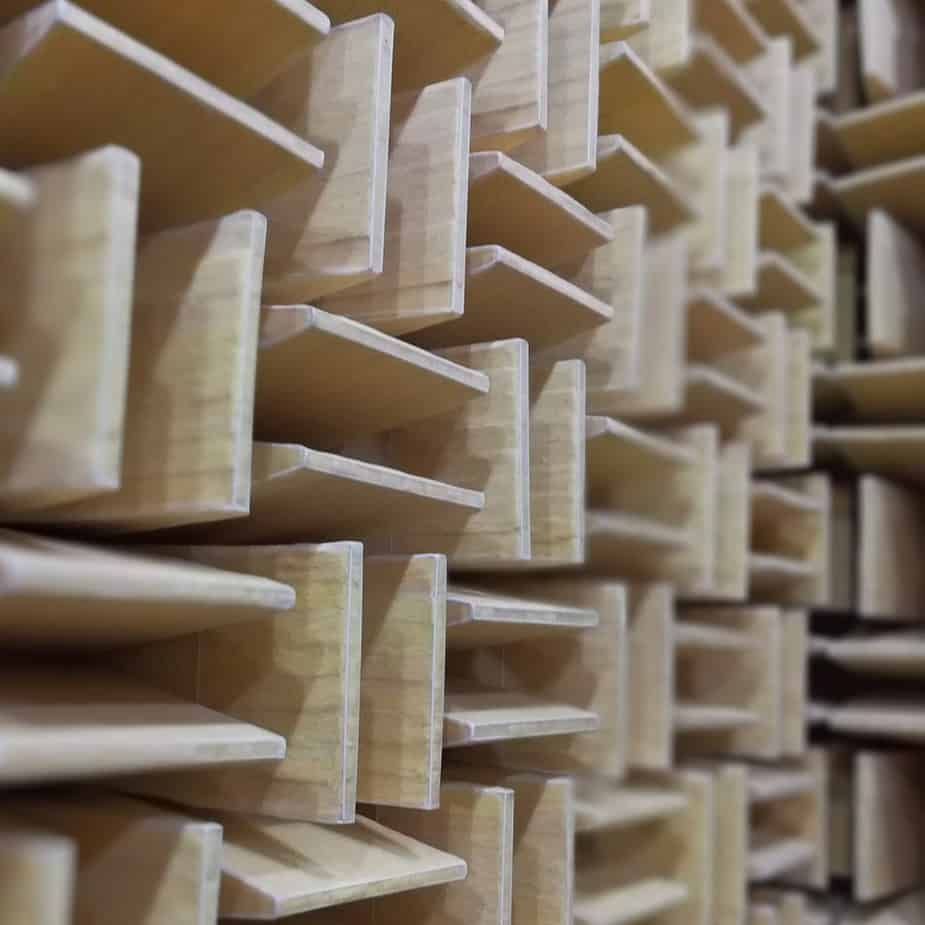
In that case, I would recommend putting acoustic panels on the ceiling, the thicker the better. You are trying to trap sound in the foam so it can have a chance of dissipating.
Your goal should be to cover as much of the ceiling as possible. The more of the ceiling you cover, the more effectively you will soundproof the room.
You will probably need a lot of panels to do this, so check out this 50 pack of soundproof panels I found on Amazon here. I use these on the ceiling of my own content creation room, and they do a fab job of separating my room acoustically from the outside world and the rest of the house.
Soundproofing the floor in your streaming room
The floor is one of the biggest transmitters of sound.
But it’s actually, along with windows, surprisingly easy to soundproof a floor to a good standard:
Cover your floor in extra layers.
Regardless of what is on the floor of your streaming room the more layers you have, such as carpets or foam tiles, the more sound insulation you will have.
If you have wooden flooring, first cover it in a layer of foam floor tiles such as these ones from Amazon. If you can, double up the thickness.
Then, cover your floor in carpet. Not wooden laminate flooring or anything hard. If your floor is already covered in carpet. Consider buying more carpet to layer over the top.
Plus, the thicker the carpet the better.
Finally, use a rug, or even a gaming towel, on the floor to absorb even more sound.
Conclusion

You can only build a relationship with your audience if they can understand you. This is why soundproofing is important. To go from an amateur set up to a crisp professional sound set up will not happen overnight.
It is all about making small steps on your soundproofing journey.
So remember to do the following:
- Cover windows with thick curtains
- Soundproof walls with acoustic panels
- Soundproof the ceiling with acoustic panels
- Sound proof floor with foam floor tiles, carpet, and rugs
And remember, the more layers you can apply, the better results you will get.
What’s next
How do I soundproof if I record from multiple places? If you don’t really have control of your recording location then I would suggest using an acoustic microphone shield. This is a wrap-around shield that is covered in acoustic foam. Instead of soundproofing the whole room, you are focusing your efforts on the microphone itself.
I’ve put up some panels as you suggested but I can still hear sound from outside. What gives? Unfortunately, the laws of physics are a difficult bunch to outwit. You see, sound travels through everything except a vacuum. So even if you stick a load of panels up on the wall, and layer 10 rugs down on the floor, sound can still travel through these materials. You will not get a perfect solution so don’t hunt for one. Instead, just aim to make your sound quality better than it was the day before.