I’ve just bought my first SD card for my Nintendo Switch.
But, when I grabbed my Switch, eager to grow its available hard drive space, I was struck by confusion: Where do I actually insert the SD card?
I turned the switch end over end in my hunt for the SD slot. Yet I found nothing.
On taking a breather, I realized that couldn’t be the only person with this problem. There must be thousands, millions of people like you and me who have no idea where to stick the SD card.
So, desperate for an answer, I slid out my phone, swiped over to the internet, and started hunting for an answer.
If you’re anything like me, you’ll “kick” yourself on hearing the answer…
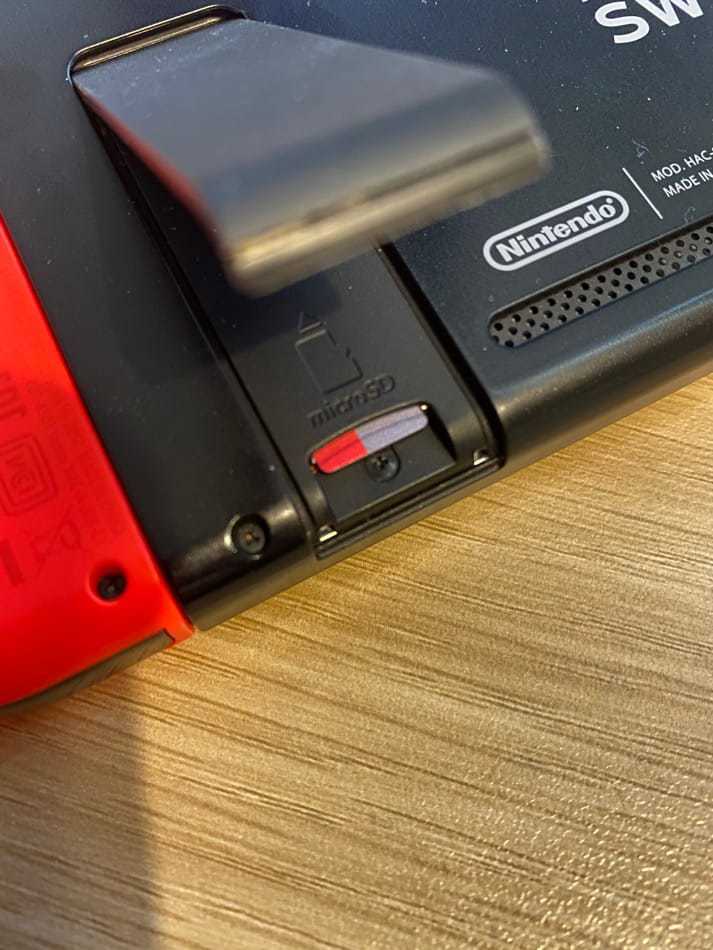
How do I insert an SD card into the Nintendo Switch? The Nintendo Switch’s SD card slot is located on the back of the console under the Kickstand. Lift the kickstand as if you were going to use it. Underneath, you’ll find an SD card slot. Insert your SD card, logo facing up, into the slot until it clicks.
Now you know where to insert an SD card into your Nintendo Switch. Or do you?
The process of inserting the SD card is a little more complex than just sticking it in and off you go!
What about formatting? And what SD card should you buy? And can you use that old SD card you salvaged from your old Smartphone?
All these questions and more will be answered in the next few sections.
Why do you need a Micro SD card for your Switch?

The Nintendo Switch, fresh out of the retail box, has only 32GB of storage space. That’s quite a bit less than most modern smartphones.
For example, my workhorse iPhone 11 has a reservoir of 64GB to quench my thirst for storage.
32GB is a not lot of space for all your games.
Unfortunately, things get worse before they get better…
You see, you don’t actually have access to all of the 32 GBs of space squirreled away inside the Switch.
Nintendo decided (because they are Nintendo and common-sense rules don’t seem to apply to them) to make the operating system so bloated, so complex, that it takes up 10GBs of the available 32GBs of space.
So in reality you only have a paltry, a meagre, a, “Please Nintendo, can I have some more?” 22GB to fill.
And that 22GB will be gobbled up fast… Pack-Man fast…
Om NOM NOM!
Why is that?
Game sizes are getting fatter and they ain’t going on a diet any time soon.
In fact, on the release of the Switch in 2017, some games were so belt-bustlingly big, I’m looking at you NBA 2K whatever, that they couldn’t squeeze their rolls into the internal Storage. You had to own an SD card or tough luck, you ain’t playin’.
To play the game you just burnt $60 on, you had to drag another fistful of dollars out of your wallet get an SD card.
There was another wrinkle in the Switch’s otherwise pristine red and blue shirt. Many games, though supplied on a game cartridge, downloaded substantial amounts of data from the internet onto your Switch. This increased the need for an SD card even further.
Additionally, even though we pretend that the Switch is a hybrid home console, it’s not really, is it?
It’s a handheld first, home console second. A handheld that was born from the success of the 3DS and DS that came before it.
Being a handheld console, you don’t really want to carry around a pocket full of game cartridges. Cartridges that seem to want, at every opportunity, to hop out of the warmth of your jeans to a crushing end under a bus wheel.
Instead, you’ll want to buy games digitally so your entire library of Mario adventures is available whenever you step out the front door.
So an SD card is an essential accessory for those who don’t want a crippled Switch experience.
But what’s the best microSD card to buy?
What MicroSD card should I buy for my Nintendo Switch?

When buying an SD card for the Nintendo Switch there are two main factors you need to keep in mind.
- Speed
- Size
Let’s take a look at both.
SD Card Speed
Games that are stored on the SD card need to be loaded in order to play them.
It makes sense to buy an SD card with a fast data transfer rate to help decrease loading times.
But if you take a look at any SD card on a website like Amazon or whatever shopping site that sinks your bank balance, you’ll notice that SD cards are anything but straightforward.
You may spot such gobbledygook as “UHS-1”, “V30”, or “A2” emblazoned on the cards like indecipherable alien badges of honor.
Along with these pointless collections of symbols will be other collections of symbols that are seemingly punched onto SD Cards just to confuse.
I’m not going to explain what all these things mean. It would be like me teaching you to ride a bike by starting with physics 101. Pointless.
So I’ll get straight to the point.
To ensure you have a fast enough microSD card for your Switch, make sure it has the following:
- It has UHS-1 or U with a 1 in it on the card. Higher numbers like UHS-3 are fine too.
- And/or the card has V30 on it. Again, higher numbers are fine.
- Read speed of 90MB/s or better.
- The symbols “A2” on it.
Buy a card with these numbers and symbols etched on it or in the description and you’ll have a card that would make Usain Bolt pure with delight.
Oh, in other words, one that’ll work perfectly with your Switch.
SD Card Size
How big an SD card do you really need in GBs? After all, you can get 32GB SD cards all the way up to 1TB SD cards (That’s 1024GBs).
Well, whatever size you are thinking about buying for your Switch, double it!
No seriously, when I first thought about buying my SD card, I thought that 128GB would be ample. What on earth would I fill it with?
Three to four copies of NBA 2K9756?
No!
Yet, I had a nasty niggle boring into the back of my neck (what? You get gut feelings, I get things boring into my neck!). It told me I may need more space. After all, games LIke Doom: Eternal and Wolfenstein were pretty big installs.
As a reaction to this neck-niggle, I opted for a 256GB micro SD card. And I can joyfully report that I’ve never regretted it.
I can install a load of games on it, and I still have plenty of space available on it for, well, just in case.
So here are the simple things to look for when it comes to buying your SD card based on space:
- Buy at least 128GB
- Buy a 256GB SD card if you can afford to
So now you know what to look for in a Micro SD card. Good luck on the hunt for one my friend.
Or, you know, you could just look at what I recommend in the next section.
My Recommended Micro SD card for the Nintendo Switch.
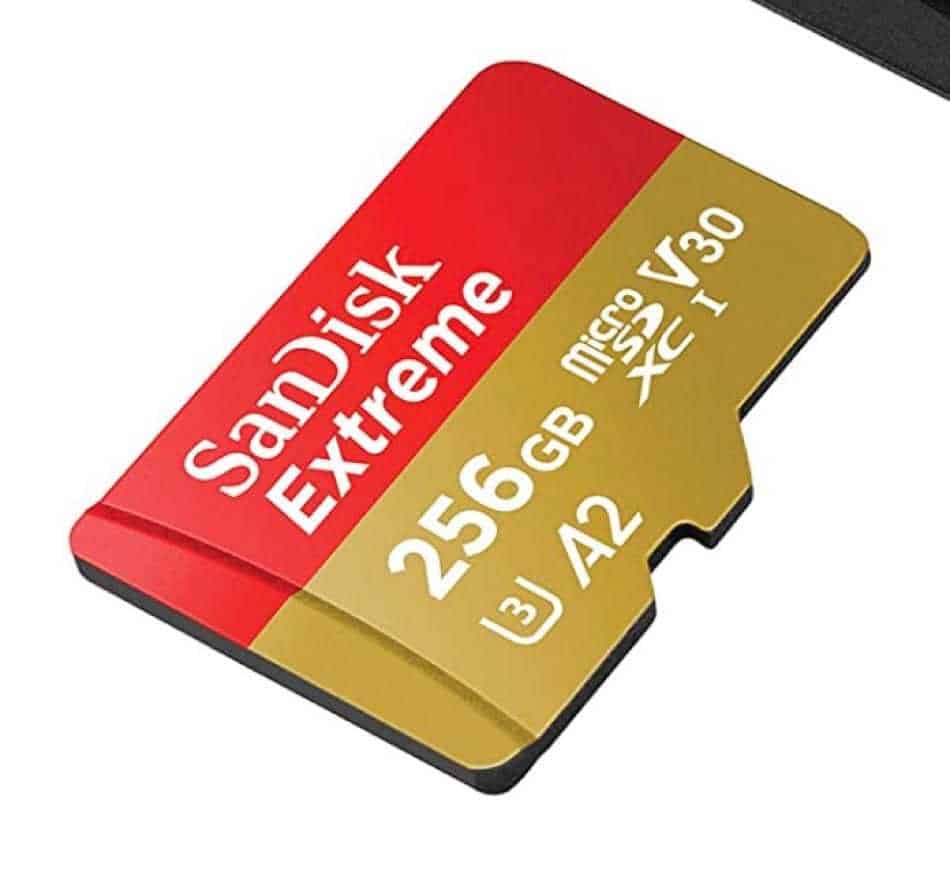
Behold, my recommendation: The 256GB Sandisk Extreme MicroSD card.
This camel of a card (it stores a lot… like a camel) has all the storage space you’ll ever need. It’s fast too. Camel racing (it’s a thing!) fast!
Certified UHS-3 and V30, the Sandisk has a read speed of over 160MB/s. That’s a full 70MB/s faster than what Nintendo recommends.
And if that’s not enough to convince you that this is the card for you, this will: The Sandisk Extreme has over 163 thousand, yes thousand, 5-star reviews. That’s a lot of people writing reviews instead of playing Zelda: Breath of the Wild!
The Extreme is the peoples’ SD card. And it’s perfect for your Switch.
Can I use an old SD card in my Switch?
Actually, yes you can.
And you can use any type of SD card so long as it’s the Micro type. Even the tiny 4GB sd card you used in that battered Android phone from 5 years ago!
Just keep in mind that older cards will be slower than newer cards. So they may cause problems in games such as stuttering, long loading times, and textures taking forever to load.
Also, you’ll need to formate the SD card. I know, one whiff of the word formate and most of us run to tech support.
But don’t worry, it’s easy. As is finding that SD card slot, as you see in the next section…
How to insert an SD card into the Nintendo Switch
And finally, we’re here. The reason why you came to this article in the first place: How to insert your SD card into your beloved console.
Well, there’s no point in me nattering on (Yes, you’ve done enough of that already! Ed). Let’s get to it!:
What you’ll need:
- Your Switch in handheld mode (Originally, I accidentally wrote Moose instead of mode here. I was so tempted to leave it in!)
- MicroSD card
The Method
1: Turn off your Nintendo Switch.
2: Turn over the Switch so the back is facing you. You should see the big Switch logo.

3: Locate the kickstand. It’s the plastic strip to the left of the Switch logo. Pull it open by pulling upwards at the bottom of the stand with your thumb.
- You may need to use a little pressure as the kickstand can be difficult to open.
- Don’t worry if you pull too hard and rip the kickstand off. You haven’t damaged your Switch. The kickstand can be easily reattached. No “plastic” surgery needed here! Get it? No! I’ll get my coat…

4: Under the opened kickstand, close to the bottom of the Switch, you’ll see a little slot with a microSD card icon above it. This is the SD card slot you’ve been looking for. Nintendo would hide it, wouldn’t they!?
5: Take your SD card in hand. Turn it so its orientation matches the logo above the SD card slot on the switch. Now, insert the card into the slot. It should only go in one way so don’t force it in. Push the SD card in until you hear a click.
6: Turn on your Switch. If your SD card is new it should be ready to use. If it’s used, it will need formatting. Either way, it’s always a good idea to format any SD card before using it.
7: To format your SD card, first, enter the settings menu by clicking on the cog icon in the bottom right-hand corner of the home screen.
- Before formatting, make sure you’re not deleting any important data. Like a bitcoin wallet password or something important.

8: In the settings, scroll down to the bottom on the left side and select “system”.
9: Now, on the right side menu, select “formatting Options”.

10: Select “Formate SD card”.

11: A pop-up will now prompt you to confirm that you want to format your SD card. Click formate.

12: The card will now be formatted and will be ready to use.
Conclusion
It wouldn’t be one of my articles without a nice bullet point summary.
Here we go:
- You need a micro SD card because:
- The Switch only has 22GBs of usable space. Silly Nintendo!
- Games are getting bigger and will not fit in the Switch’s internal storage
- When buying an SD card it should be:
- 256 GB (128GB min)
- Class A2
- UHS-1 or better
- V30 or better
- Have a read speed of 90MB/s or faster
- My recommended MicroSD card is the 256GB Sandisk Extreme
- It offers 160MB/s read speeds
- It has over 160 thousand 5-star reviews
- It’s my card of choice
- The SD card slot is under the kickstand on the back of the Switch
- The SD card should be formatted before use.
What Next?
How do you clean the Nintendo Switch charging port? Cleaning the Nintendo Switch charging port can be done with a few simple tools. Check out my article here to see how it’s done.
How do I clean the Nintendo Switch’s vents? The vents can be cleaned easily with compressed air, a vacuum cleaner, and some antistatic brushes. However, it is possible to damage the Switch if you are not careful. Check out my article here to see how to clean your Switch’s vents.
What was that SD card you mentioned? It’s the 256GB Sandisk Extreme MicroSD card.